
Office lobbies serve as the first impression of a business, blending professionalism with aesthetic appeal to welcome clients, employees, and visitors. Among the various decorative materials available, PVC marble wall panels have emerged as a top choice for modern office lobbies. Combining the luxurious look of natural marble with the practical advantages of PVC, these panels offer durability, easy maintenance, and cost-effectiveness. For businesses seeking to elevate their lobby’s appearance without compromising on functionality, proper installation of PVC marble wall panels is crucial. This comprehensive guide will walk you through every step of the installation process, ensuring a seamless and long-lasting result that showcases the beauty of PVC marble wall panels.
Why Choose PVC Marble Wall Panels for Office Lobbies?
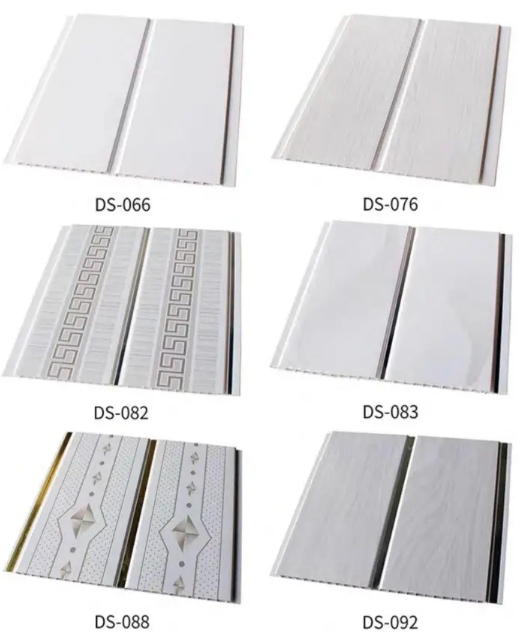
Before diving into the installation steps, it’s essential to understand why PVC marble wall panels are an ideal fit for office lobbies. Unlike natural marble, which is heavy, expensive, and requires tedious maintenance, PVC marble wall panels are lightweight, affordable, and resistant to scratches, stains, and moisture. Their versatility allows them to mimic the texture and color of real marble, offering a high-end look without the high cost. Additionally, PVC marble wall panels are easy to cut and install, making them suitable for both new constructions and renovation projects. For businesses that prioritize efficiency and aesthetics, these panels provide the perfect balance—enhancing the lobby’s visual appeal while reducing installation time and long-term maintenance costs.
Another key advantage of PVC marble wall panels is their customization capability. As New Create Plywood Company Limited offers customized processing and production according to different customer needs, businesses can select PVC marble wall panels in various sizes, colors, and patterns to match their office’s brand identity and design theme. Whether aiming for a sleek, modern look or a classic, elegant vibe, PVC marble wall panels can be tailored to meet specific requirements, making them a flexible choice for any office lobby.
Pre-Installation Preparation
Proper preparation is the foundation of a successful PVC marble wall panel installation. Rushing through this phase can lead to uneven surfaces, loose panels, and costly mistakes. Follow these steps to ensure your installation starts on the right foot.
Inspect the PVC Marble Wall Panels
Before beginning the installation, carefully inspect all PVC marble wall panels for any defects. Check for cracks, chips, discoloration, or inconsistencies in texture. Ensure that the panels are of the correct size and thickness as ordered. New Create Plywood Company Limited maintains a complete and scientific quality management system, so you can trust that their PVC marble wall panels meet high standards, but a final inspection is still recommended to avoid issues during installation. If any panels are damaged or faulty, contact the supplier immediately for replacements.
Prepare the Installation Site
The wall surface where the PVC marble wall panels will be installed must be clean, flat, and dry. Start by removing any existing wallpaper, paint, or debris from the wall. Fill in any holes, cracks, or uneven areas with a high-quality wall filler, and smooth the surface using sandpaper. Ensure the wall is free of moisture—use a moisture meter to check the humidity level, as excess moisture can cause the panels to warp or peel over time. If the wall is newly constructed, allow it to dry completely before proceeding. Additionally, remove any obstacles such as light switches, outlet covers, or decorative fixtures to create a clear installation area.
Gather the Necessary Tools and Materials
Having the right tools and materials on hand will streamline the installation process. For installing PVC marble wall panels, you will need:
- Measuring tape and a spirit level for accurate measurements and alignment
- A utility knife or circular saw with a fine-tooth blade for cutting the panels
- Adhesive specifically designed for PVC materials (ensure it is waterproof and durable)
- Screws or nails (if using a mechanical fastener method)
- A caulking gun and silicone sealant for sealing gaps and joints
- A rubber mallet for gently tapping panels into place
- Safety equipment such as gloves, goggles, and a dust mask
Step-by-Step Installation Process
With the preparation complete, it’s time to start installing the PVC marble wall panels. Follow these detailed steps to achieve a professional finish.
Measure and Mark the Wall
Begin by measuring the height and width of the wall to determine the number of PVC marble wall panels needed. Use a measuring tape to take precise measurements, and mark the wall with a pencil to indicate the placement of each panel. Ensure the marks are straight and aligned using a spirit level. For panels that need to be cut to fit around corners, outlets, or other obstacles, measure the exact dimensions and mark the panels accordingly. Remember to leave a small gap (approximately 1/8 inch) between the panels and the ceiling, floor, and corners to allow for expansion and contraction of the PVC material due to temperature changes.
Cut the PVC Marble Wall Panels
Using the marked measurements, cut the PVC marble wall panels to the required size. For straight cuts, use a utility knife to score the panel along the marked line, then snap it gently. For more complex cuts (such as around outlets or corners), use a circular saw with a fine-tooth blade to ensure a clean, precise cut. Always wear safety goggles and a dust mask during cutting to protect against debris. After cutting, smooth the edges of the panels with sandpaper to remove any rough spots.
Apply Adhesive to the Panels
There are two common methods for installing PVC marble wall panels: adhesive-only and adhesive with mechanical fasteners. For office lobbies, the adhesive-only method is often preferred for a seamless look. Apply the PVC-specific adhesive evenly to the back of the panel using a notched trowel. Ensure the adhesive covers the entire back of the panel, paying extra attention to the edges and corners to prevent lifting. Avoid applying too much adhesive, as excess can seep out between the panels and mar the finish. For larger panels or walls with uneven surfaces, supplement the adhesive with screws or nails for added stability. Drill small pilot holes in the panels (near the edges) and drive the screws or nails into the wall studs, ensuring they are countersunk so they don’t show.
Install the Panels on the Wall
Start installing the PVC marble wall panels from the bottom left corner of the wall (or the corner closest to the main entrance for a more visually appealing result). Align the first panel with the marked lines on the wall, and press it firmly into place. Use a rubber mallet to gently tap the panel to ensure full contact with the adhesive. Check the panel with a spirit level to ensure it is straight both horizontally and vertically. If adjustments are needed, lift the panel slightly and reposition it before the adhesive dries.
Continue installing the panels one by one, working your way up and across the wall. Ensure each panel is tightly fitted against the previous one to minimize gaps. If gaps occur, use silicone sealant to fill them in later. For panels that need to be joined at corners, cut the edges at a 45-degree angle for a clean mitered joint. Alternatively, use corner trim pieces designed for PVC marble wall panels to cover the joint and add a polished look.
Seal Joints and Finishing Touches
Once all PVC marble wall panels are installed, allow the adhesive to dry completely (follow the manufacturer’s instructions for drying time, typically 24-48 hours). After the adhesive has dried, use a caulking gun to apply silicone sealant along the joints between panels, as well as along the edges where the panels meet the ceiling, floor, and corners. This will prevent moisture from seeping behind the panels and improve the overall appearance of the installation.
Replace any light switches, outlet covers, or decorative fixtures that were removed earlier, ensuring they fit neatly against the PVC marble wall panels. Wipe down the panels with a clean, damp cloth to remove any dust, adhesive residue, or fingerprints. For a final touch, polish the panels with a dry cloth to enhance their shine and bring out the marble-like texture.
Post-Installation Maintenance Tips for PVC Marble Wall Panels
To keep your office lobby’s PVC marble wall panels looking their best for years to come, follow these simple maintenance tips:
- Regularly clean the panels with a soft cloth and mild detergent (avoid abrasive cleaners or harsh chemicals, as they can damage the surface).
- Wipe up spills immediately to prevent staining.
- Inspect the panels periodically for signs of damage, such as cracks or peeling. If any issues are found, contact a professional to repair or replace the affected panels.
- Avoid placing heavy objects against the panels or using sharp tools near them, as this can cause scratches or dents.
New Create Plywood Company Limited’s PVC marble wall panels are designed for durability and easy maintenance, but proper care will extend their lifespan and keep them looking as good as new. With their resistance to moisture, stains, and wear, these panels are an excellent long-term investment for office lobbies.
Why Trust New Create Plywood Company Limited for Your PVC Marble Wall Panels?
When it comes to selecting PVC marble wall panels for your office lobby, choosing a reliable supplier is just as important as proper installation. New Create Plywood Company Limited, founded in July 2022 and located in Bac Giang Province, Vietnam, is a trusted manufacturer with a complete and scientific quality management system. With over 200 employees and a production area of more than 100 acres, the company specializes in the production and sales of high-quality decorative panels, including PVC marble wall panels.
New Create Plywood Company Limited offers customized processing and production to meet the unique needs of each customer, ensuring that you get PVC marble wall panels that perfectly fit your office lobby’s design and dimensions. Their products are sold to fifty countries worldwide, with an annual turnover of more than 30 million, and have received unanimous praise for their quality and performance. Additionally, the company’s professional quality inspection and after-sales team ensures that every PVC marble wall panel meets strict standards, and they provide support throughout the installation and maintenance process.
Whether you’re renovating an existing office lobby or building a new one, New Create Plywood Company Limited’s PVC marble wall panels are the ideal choice for achieving a sophisticated, durable, and cost-effective finish. With their easy installation process and low maintenance requirements, these panels will transform your office lobby into a welcoming and professional space that leaves a lasting impression on everyone who enters.
In conclusion, installing PVC marble wall panels for office lobbies is a straightforward process that requires careful preparation, precise measurements, and attention to detail. By following the steps outlined in this guide, you can achieve a seamless installation that showcases the beauty and functionality of PVC marble wall panels. With the right tools, materials, and a reliable supplier like New Create Plywood Company Limited, your office lobby will have a stunning, long-lasting finish that enhances its aesthetic appeal and professionalism.
